Up to $250 Off
Enter your email below to get the offers!
|
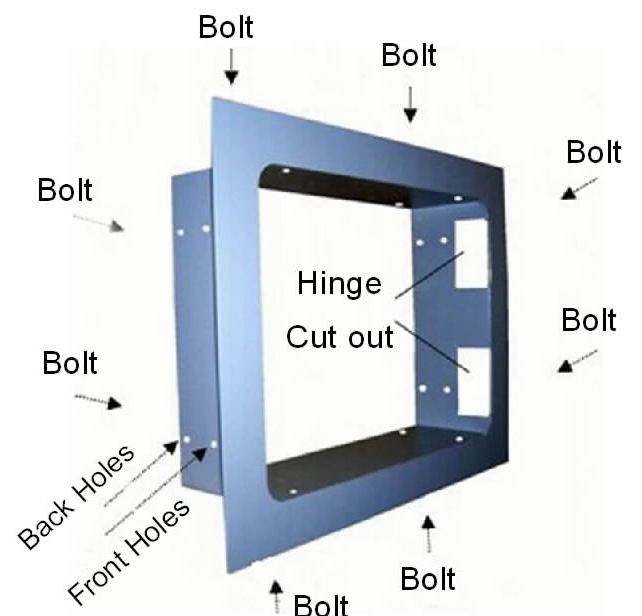
How to Install Gardall Wall Safe Models For trouble shooting, call Gardall 1 (877) 442-9964 1) After deciding on a location for the safe on the wall, locate the studs in that area either with a stud detector or by tapping the wall to find the hollows 2) Mark the inside edge of the studs to determine their location. Using those marks as your left and right outer edge of the safe - draw in the top and bottom edge of the safe so that you have a square the height and width of your safe (do not include the flange in these dimensions). Cut your hole on the inside of these lines about 1/2" in to allow for error or breaking of wall unevenly. Once you have cut the wall you can look in to make sure you are between the studs. Finish cutting wall and use your safe to insure a snug fit. IT IS IMPORTANT TO TEST THE SAFE. Close and lock the door of the safe. When you pull on the dial toward you and push in on the dial toward the safe, there should be play in the door (A loose fit). The play in the door prevents pressure on the locking bolt that might cause the safe to stick shut. YOU WANT THE SAFE TIGHT BETWEEN THE STUDS? If the safe doesn't fit and the hole is too small, gradually shave a little off the studs until the fit is comfortable. If you are installing a wall safe with a flange, no finishing of the wall is required for neatness. If your safe has no flange, the hole you have cut could be framed for a professional finish, keeping in mind that the safe should be concealed behind a picture or mirror that must lie flush against the wall in order not to look suspiciously obvious.
For trouble shooting, call Gardall 1 (877) 442-9964 |
|
|