Up to $250 Off
Enter your email below to get the offers!
How to Install Sentry 7150 Wall Safe
(if you have any problems during installation, please call Sentry 1-800-828-1438)
Tools Needed:
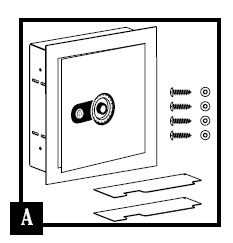
1. First, place the paper work with your combination aside. You don't want to make the mistake of locking it in your new safe. Unpack all contents from the carton and familiarize yourself with them (Figure A). The contents should be as follows:
|
 |
2. Choose the location where you want to install your wall safe.
|
 |
3. In the wall you have chosen, locate two adjacent studs. Home improvement and hardware stores carry electronic stud finders. You could also carefully use a hammer to gently tap the wall. When you strike a solid area (stud) the sound the hammer makes will be a dull thud.
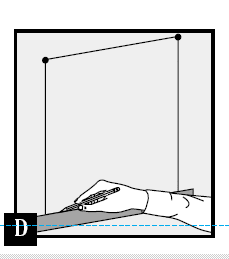
| 4. Your enclosed instruction sheet is your installation template. This template is your pattern to lay out the correct hole you are going to make in your wall. Hang your template on the wall using a level. Place the level at the height where you want your safe then line the template up with it. (Figure C) Tack the template in place. The tack pinholes left behind will mark the four corners of the opening you will cut for your safe. Remove the template and tacks (nails). (Figure D)
|
  |
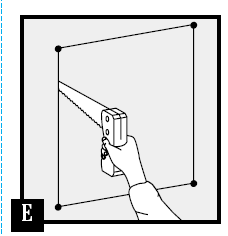
| 5. Using a pencil and straight edge, mark out a square by connecting the four tack holes
6. Cut out and remove the marked section of drywall using a scroll saw or sabre saw or utility knife
|
 |
| 7. You will want to use shims to make sure your safe will be tight in the wall between the studs. A shim is a thin, often tapered piece of wood. You will be using them as fillers between the safe and the studs. For most situations a 1/4" thick shim will work. Place a shim on the right side of the opening, centering it vertically and nail it in place (Figure F). Repeat the same for the left side. |  |
If you want to make your safe even more difficult to remove from the wall (for greater security), then you can add headers between the studs above and below the opening you have cut. This allows you to anchor all four sides of the wall safe. Additional screws will be required.
One advantage of the Sentry wall safe if that you can place the safe into the wall so the door opens either right or left. When you place the safe in the hole you have cut, make sure the hinges are on the side towards which you want the door to open.
| 8. Mount the safe in the hole you have cut. Make sure the safe is level and that the back side of the flange is flush with the outside of the wall. Place the mounting screws and washers and tighten with screwdriver. (Figure G) | 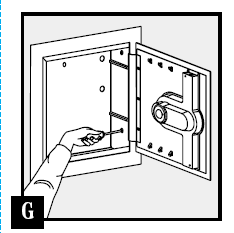 |
| 9. Install interior shelves. (Figure H) | 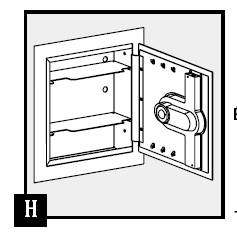 |
For trouble shooting, call Sentry 1-800-828-1438